Download
Setup guide

First launch: sign in, choose a folder, open the Studio.

Chapter two. The installer is done; now the app asks for an account, a verification code and one folder. Then it gets out of the way. The last steps cover adding your own API keys if needed and using the portable build.

Written against 1.1.0 on Windows 11 — all 7 steps pictured
Chapter 2 of 2 First launch and setup
08

The sign-in screen

Step 08 Scena Studio Render of the design
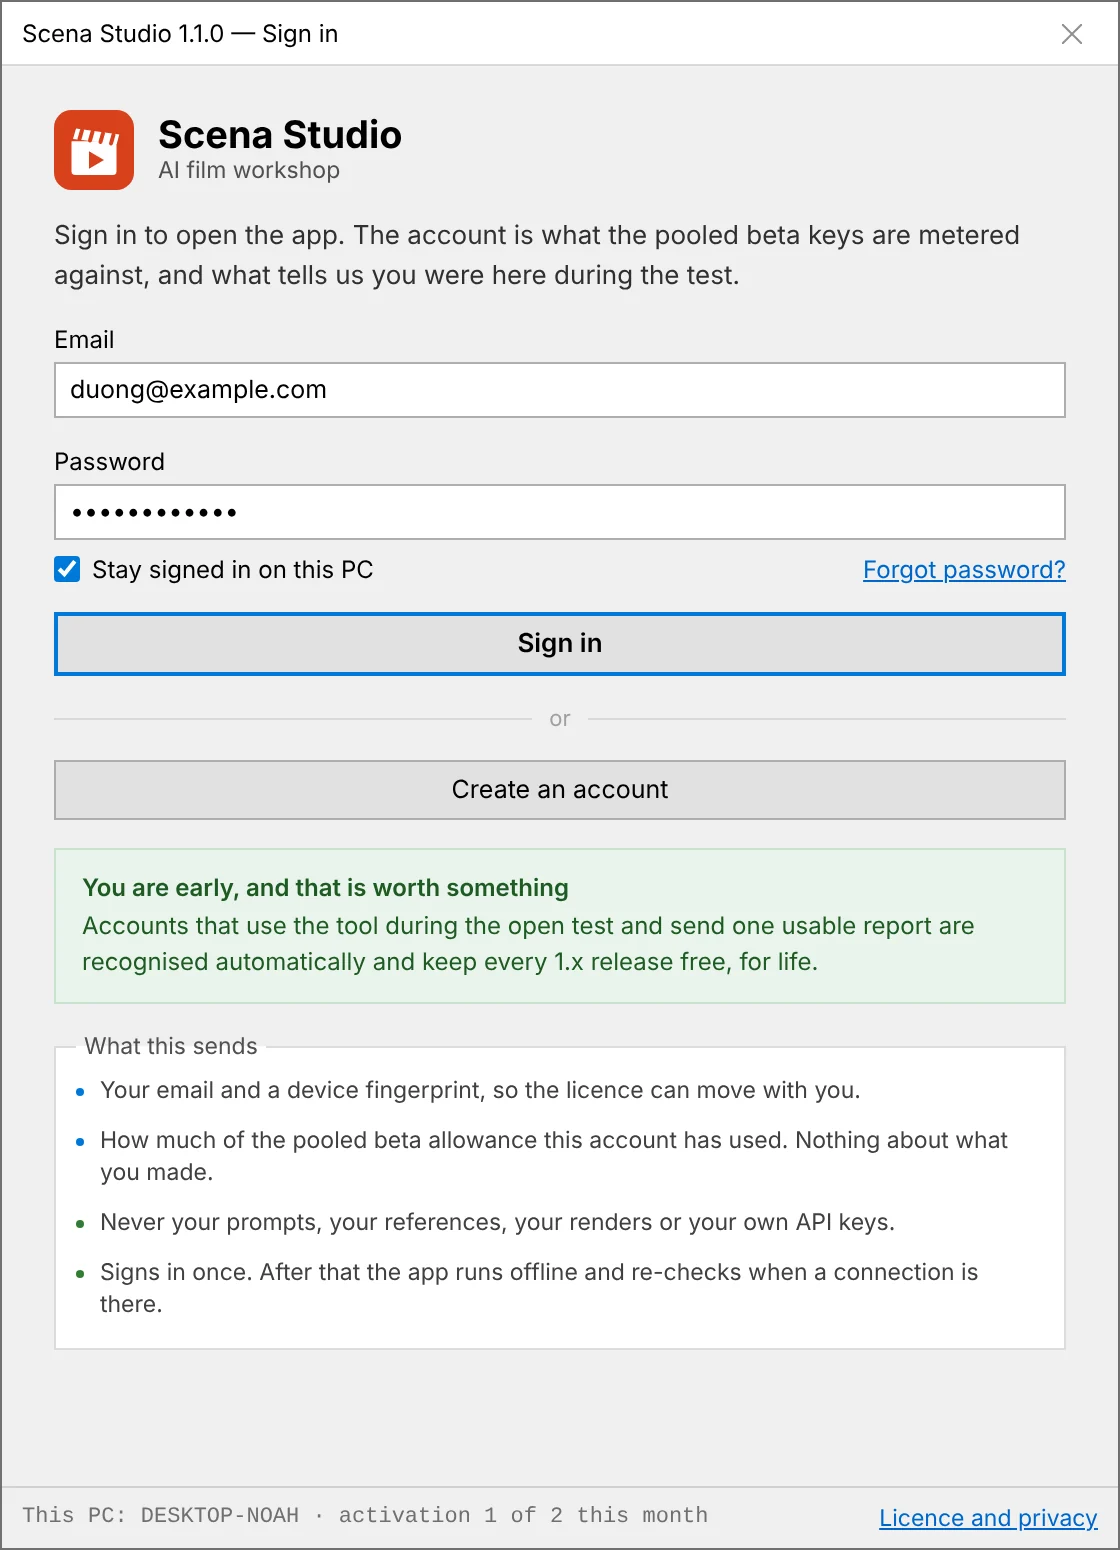
The Sign in dialog on first launch — Email and Password fields, the Sign in button, and the Create an account link underneath
First launch. Nothing in the app opens until there is an account behind it. Sign in Create an account
What you will see A small window titled Sign in: Email, Password, a "Stay signed in on this PC" tick box, a Sign in button and two links — Forgot password? and Create an account. A language switch sits in the title bar.
What to do New here? Click Create an account. Already have an account? Sign in and check which API keys are available in your build.

If not: The window says it cannot reach the sign-in server? Check the PC is online and try again; a proxy or firewall that blocks the app will stop here. The address it needs is on the download page under "What it connects to".

09

Create the account

Step 09 Scena Studio Render of the design
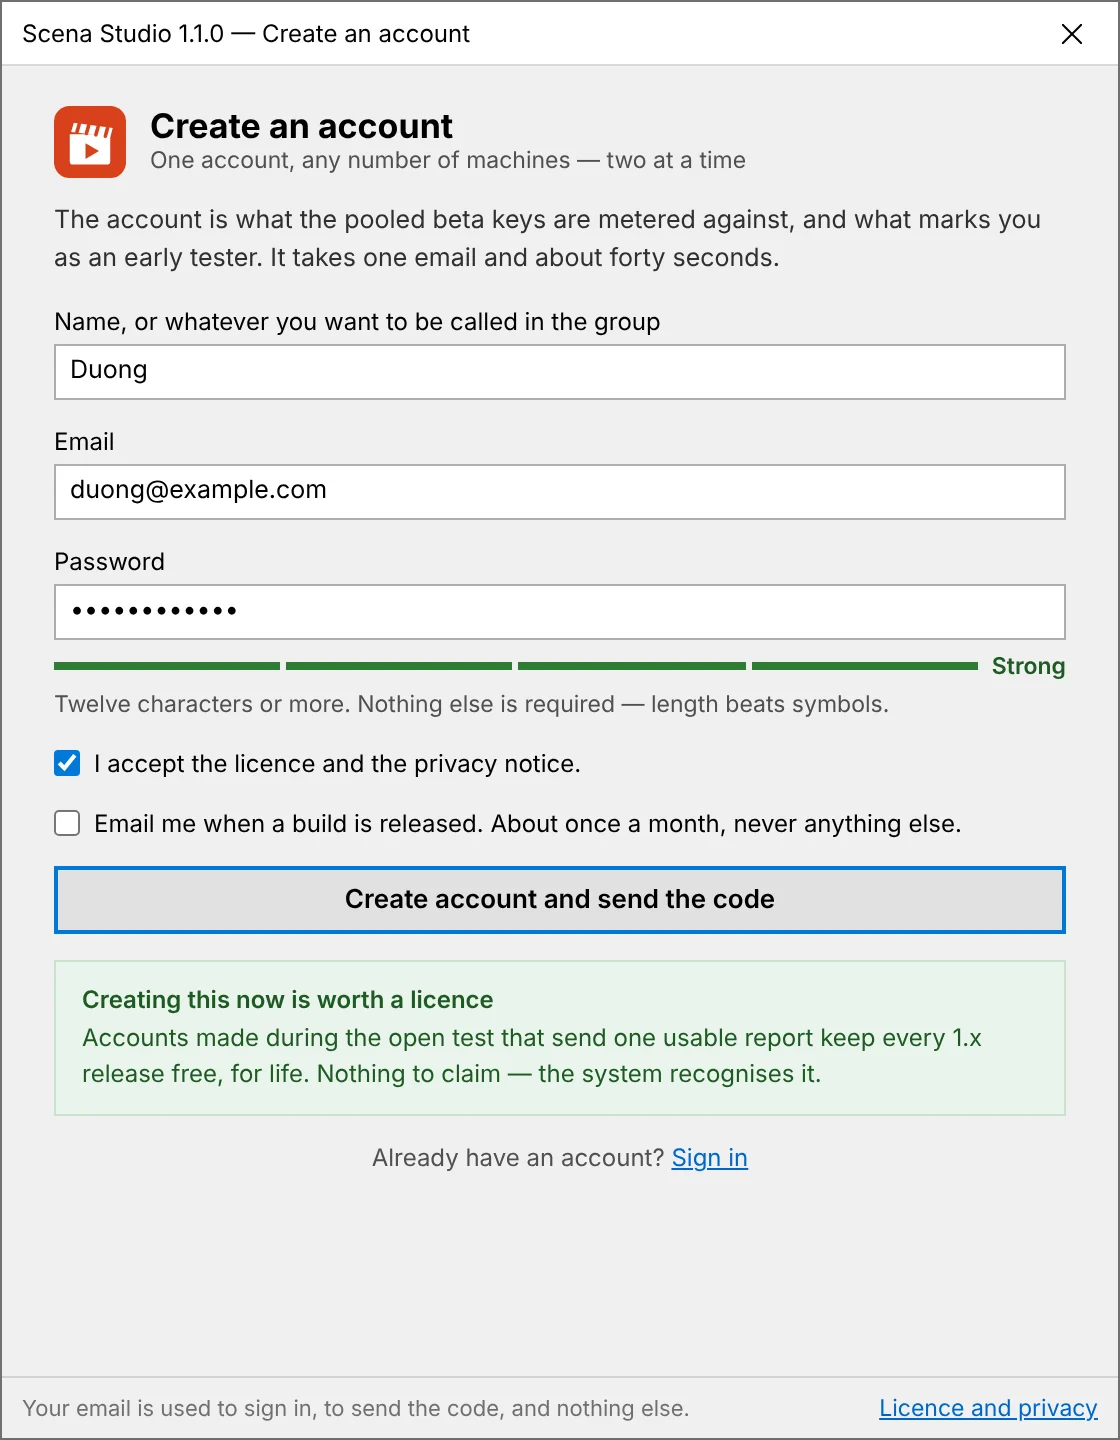
The Create an account dialog filled in with the test name and email, the licence tick box ticked, before pressing the button
One minute. The email must be one you can open right now. Create account and send the code
What you will see Four things: a name (anything you like), an email, a password, and a tick box accepting the licence. A second, optional box asks whether to email you when a build is released.
What to do Fill them in and click Create account and send the code. The app moves to the verification screen on its own.

If not: Use a real inbox — the next step needs it. The release-notes box is optional and off by default; nothing else ever emails you.

10

Enter the six-digit code

Step 10 Scena Studio · your inbox Render of the design
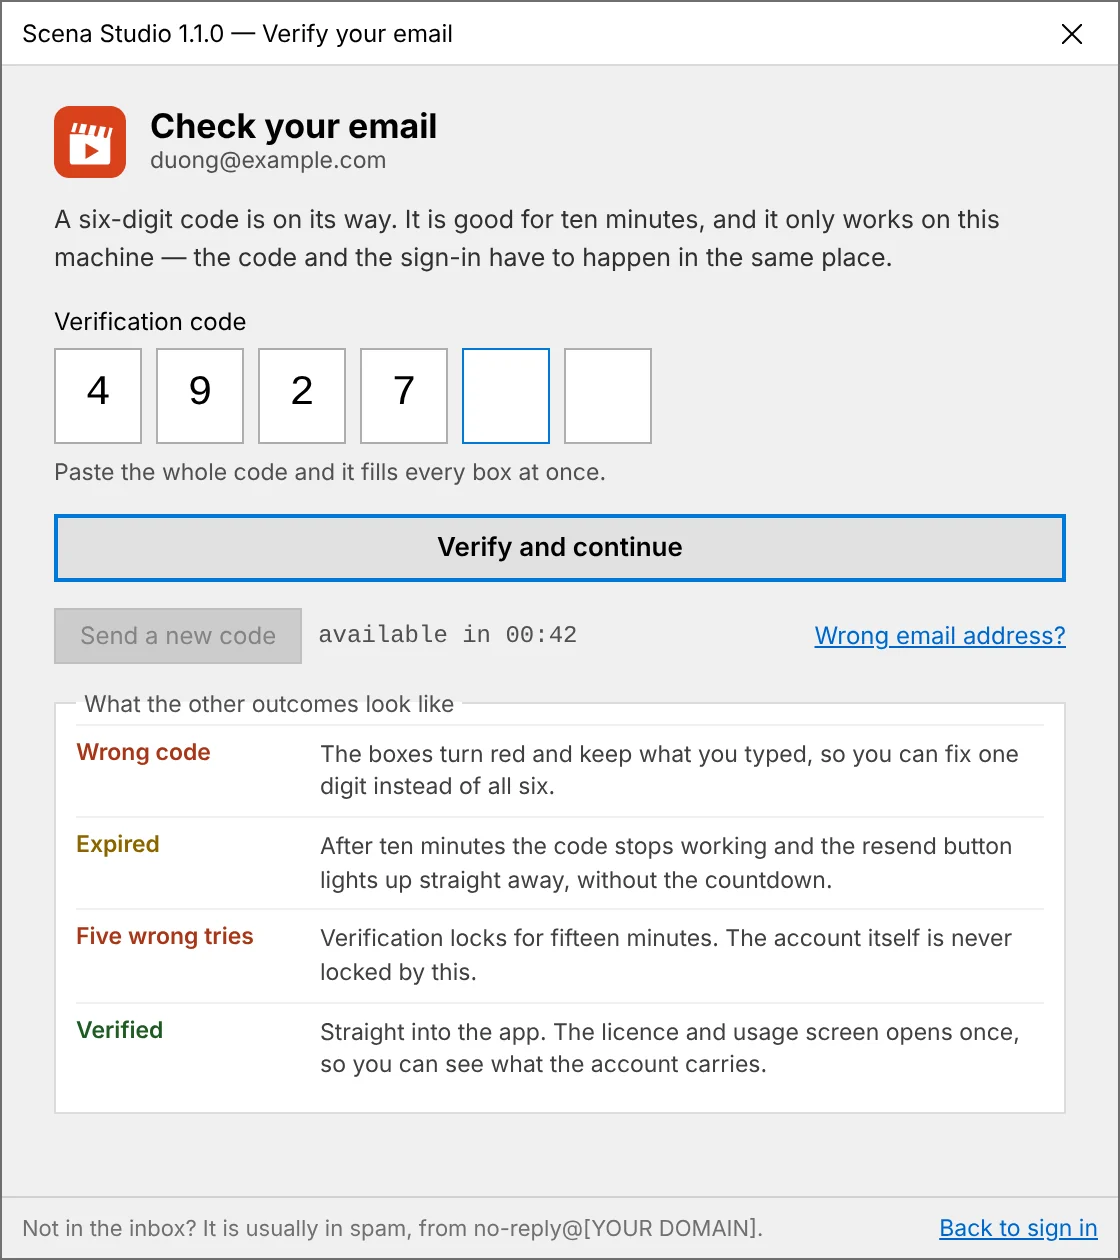
The Verify your email dialog with the six code boxes, four already filled — and, if possible, the email itself open beside it
The code arrives in under a minute from the address shown on screen. Six boxes — the app opens on the last digit
What you will see Six boxes for the code and a Send a new code link that stays greyed out for sixty seconds. The email comes from no-reply@scenastudio.app with the subject "Your Scena Studio code".
What to do Type the six digits. The app opens the moment the last one lands; there is no button to press.

If not: No email after two minutes: check spam, then Send a new code. Wrong address? The link under the boxes takes you back to fix it. The code is good for ten minutes.

11

Choose where episodes live

Step 11 Scena Studio Windows 11 · 1.1.0
Select Project Folder — Scena Studio This PC ▸ NVMe Scratch (D:) ▸ ScenaEpisodes This PC Local Disk (C:) NVMe Scratch (D:) 842 GB free · Local SSD 📁 EE001 — The Little Red Bicycle 📁 _shared_references 📁 _exports_fcpxml Folder: D:\ScenaEpisodes\EE001 Select Folder Cancel
The one setting worth a moment’s thought. This folder is the one that grows.
What you will see A standard Windows folder picker asking where episodes should live. Renders add up fast — a 46-shot episode at 1080p is several gigabytes.
What to do Pick a drive with room, make a folder such as D:\ScenaEpisodes, and select it. You can move it later from Settings, and every path in the app stays relative to it.

If not: Picked wrong? Settings → General → Episodes folder. Existing episodes are moved for you; nothing needs re-importing.

12

The Studio opens — empty, and ready

Step 12 Scena Studio Render of the design
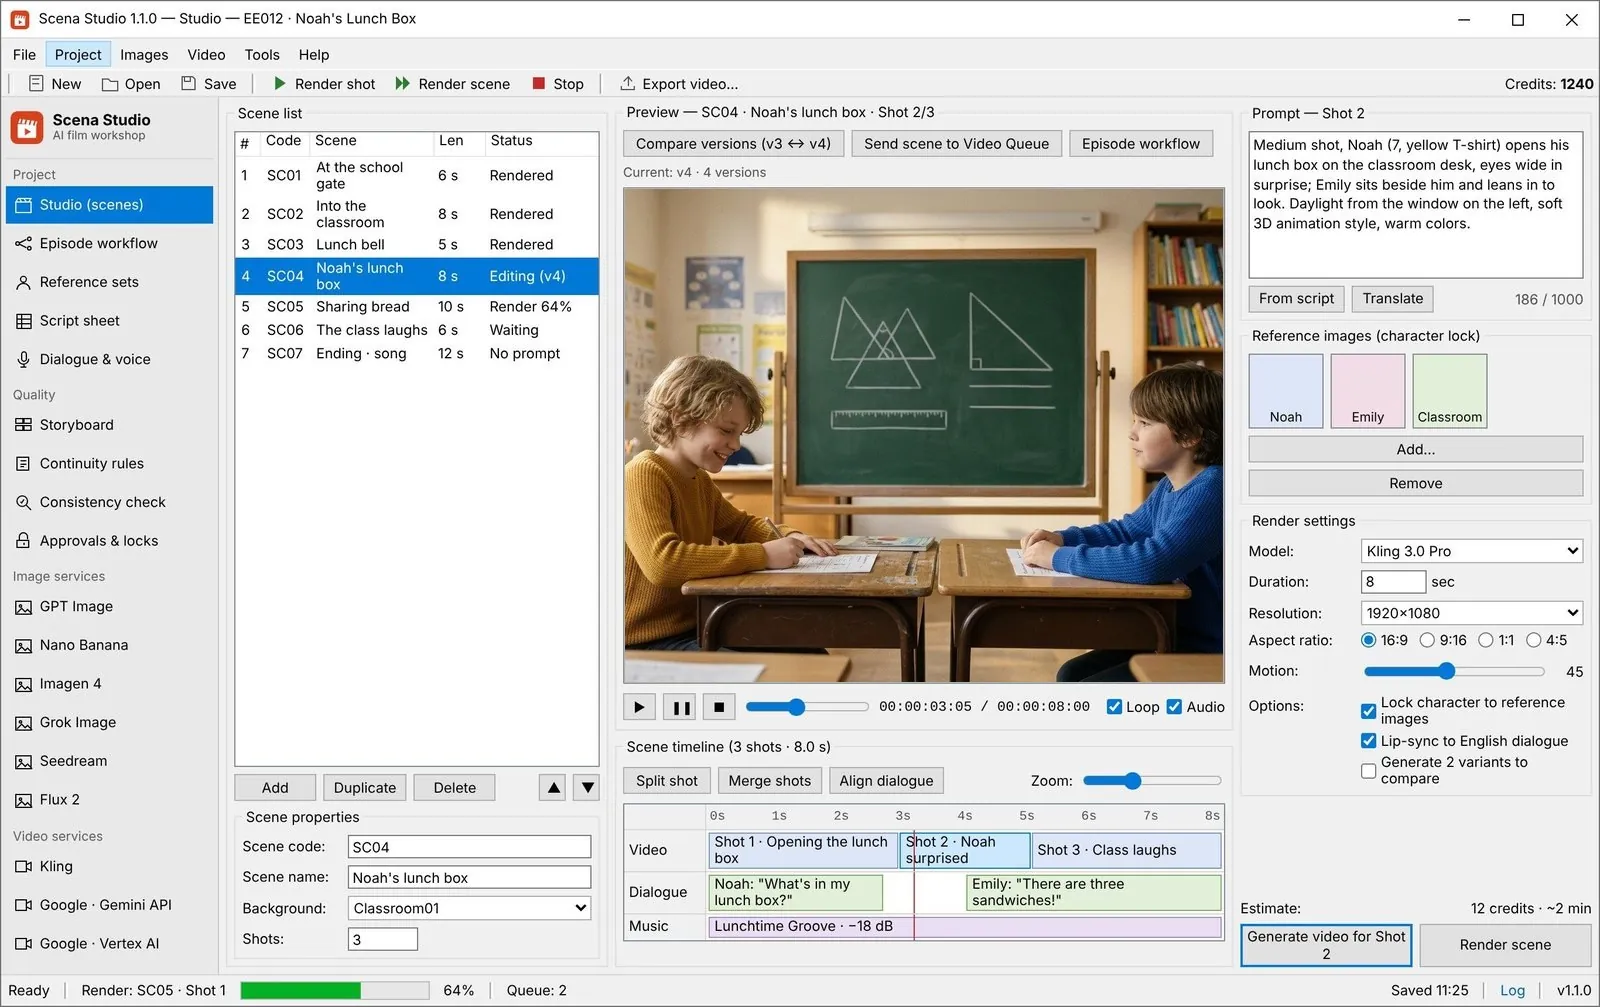
The main Studio window right after setup: the empty scene list, the sidebar, and the New episode button in the centre
This is the app. Everything from here is a project, not a setting. New episode
What you will see The main window: menu bar, the left rail with Project, Quality, Image services, Video services, Tools and Help, and an empty middle with one button — New episode. The status bar at the bottom shows connection status. Check Tools → API services before you queue a render.
What to do Click New episode, give it a code and a title, and the folder tree is made for you. The workflow guide takes it from here, step by step.

If not: The status bar says a service is not reachable? That one service is down, not the app — the rest of the queue runs. The status page lists what is known.

13

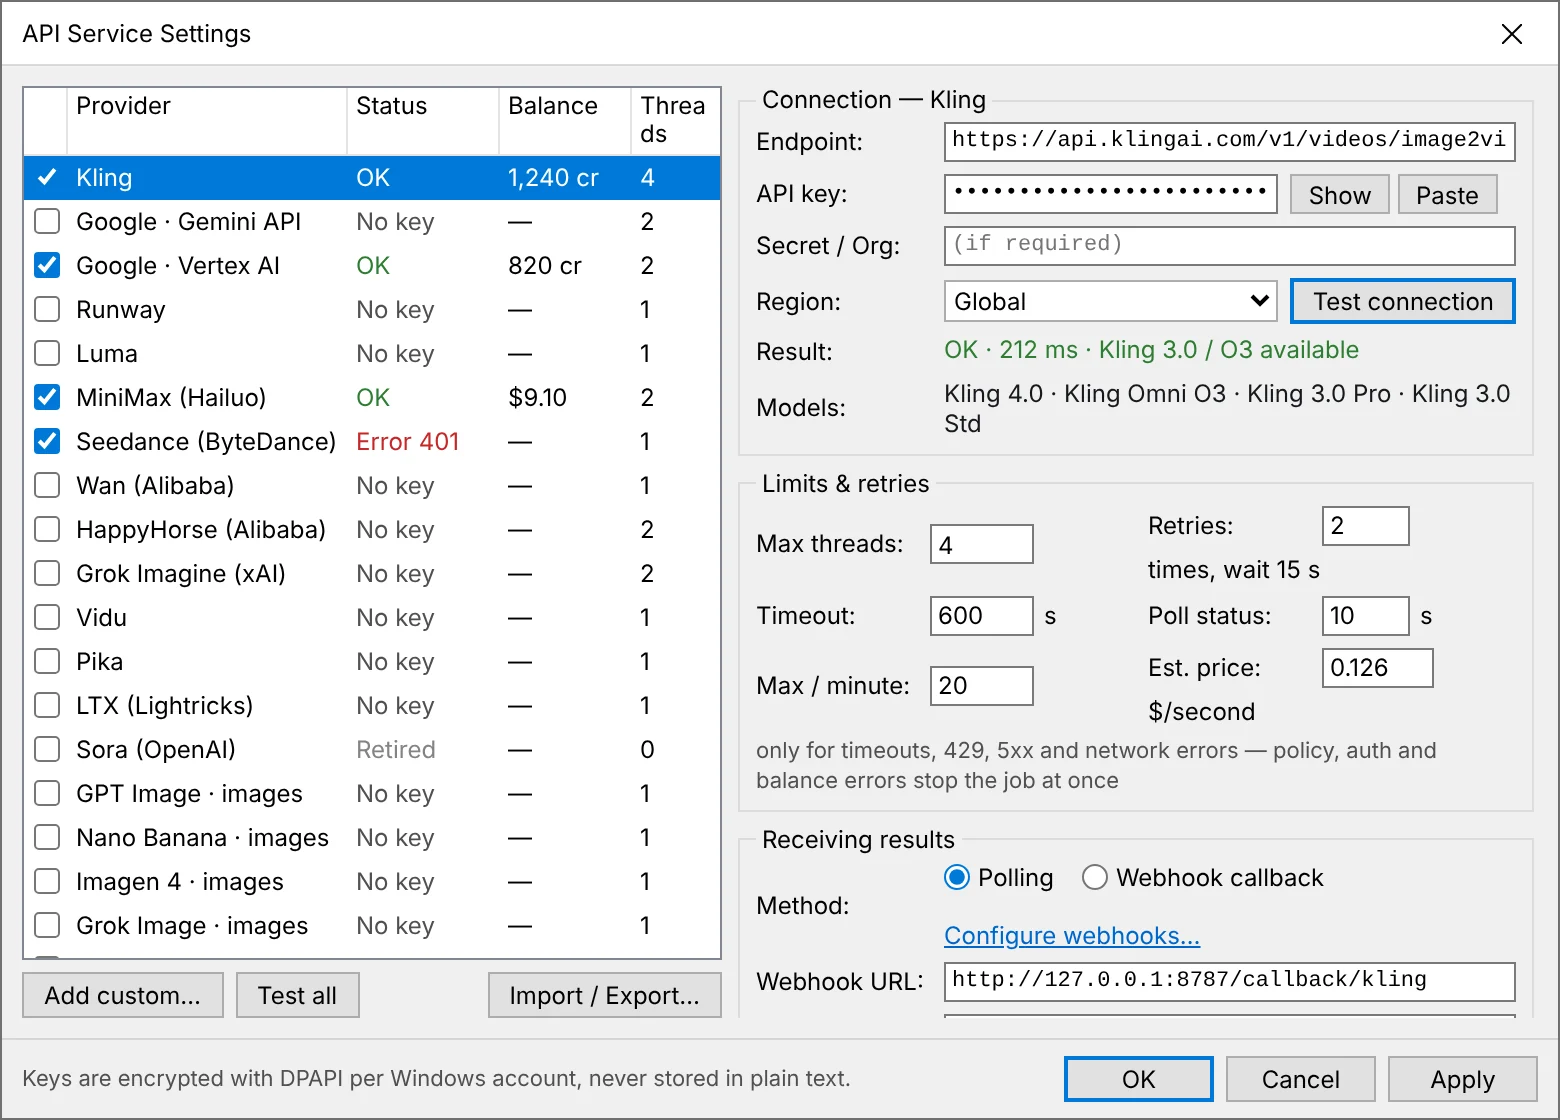
Add your own API keys if needed

Step 13 Tools → API services Render of the design
The API services dialog with the provider table, one row expanded showing a key pasted in and a green "tested" state
Use your own key if shared access is unavailable for your model or has ended. Paste the key Test connection
What you will see A table of every provider the app supports, each with a key field, an endpoint, and a Test button. At the start of the Open Test, shared API access is free only for models where it is enabled. Provider availability and rate limits apply.
What to do If you use your own key, paste it and press Test. Your provider bills work run on that key. Scena Studio protects saved keys with Windows DPAPI.
14

Optional — the portable ZIP instead

Step 14 Explorer Windows 11 · 1.1.0
scena-studio-1.1.0-win-x64.zip Properties General ZIP scena-studio-1.1.0-win-x64.zip Type of file: Compressed (zipped) Folder (.zip) Location: C:\Users\Creator\Downloads Size: 50.8 MB (53,292,569 bytes) Security: This file came from another computer and might be blocked to help protect this computer. Unblock OK Cancel Apply
For a USB stick, a locked-down PC, or two versions side by side.
What you will see A single ZIP. Windows marks every downloaded archive, and extracting a marked archive leaves every file inside marked too — the app then looks broken on launch.
What to do Right-click the ZIP → Properties → tick Unblock → OK. Then Extract All to a normal folder such as D:\ScenaStudio — not Program Files, and not from inside the ZIP viewer. Run ScenaStudio.exe; steps 03 to 05 and 08 to 12 are the same.

If not: The portable build does not update itself. Extract the new ZIP over the old folder and keep settings.json.

Folder checklist Place episode folders on a local NVMe or SATA SSD Keep active episode folders outside live OneDrive or Dropbox sync Each episode folder stays self-contained with its own project.db
Download the installer