Install Scena Studio on Windows, one screen at a time.
Fourteen steps in two chapters, with a screenshot of every screen Windows and the app will show you. Chapter one gets the file onto the PC and through Windows’ own gates. Chapter two takes you from first launch to an empty Studio.
Written against 1.1.0 on Windows 11 — all 7 steps picturedDownload the installer
If not: A corporate PC may block .exe downloads outright. Use the Portable ZIP from the same page; it needs no admin rights and nothing is written outside its folder.
Check the file is genuine
If not: If the two hashes differ, delete the file, download again, and tell us in the group. Do not run a file whose hash does not match.
Run the file, meet SmartScreen
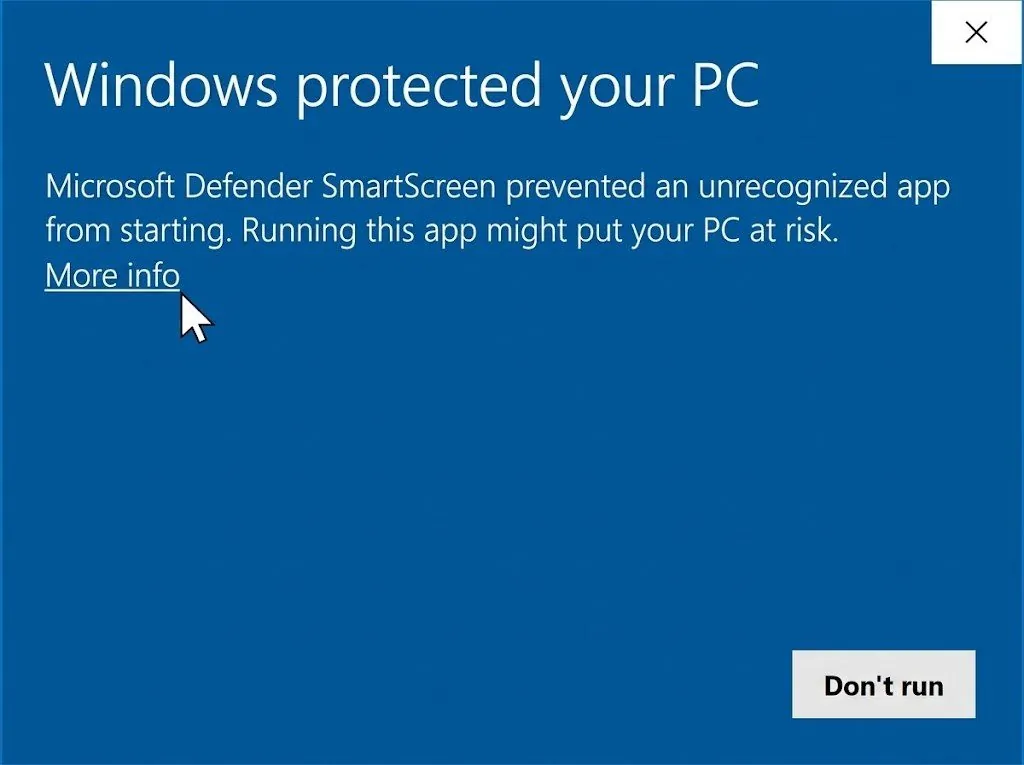
If not: No blue dialog at all? That is fine — it appears on most machines but not every one, because reputation is counted per region and per build. Go to step 05.
Confirm the name, then Run anyway
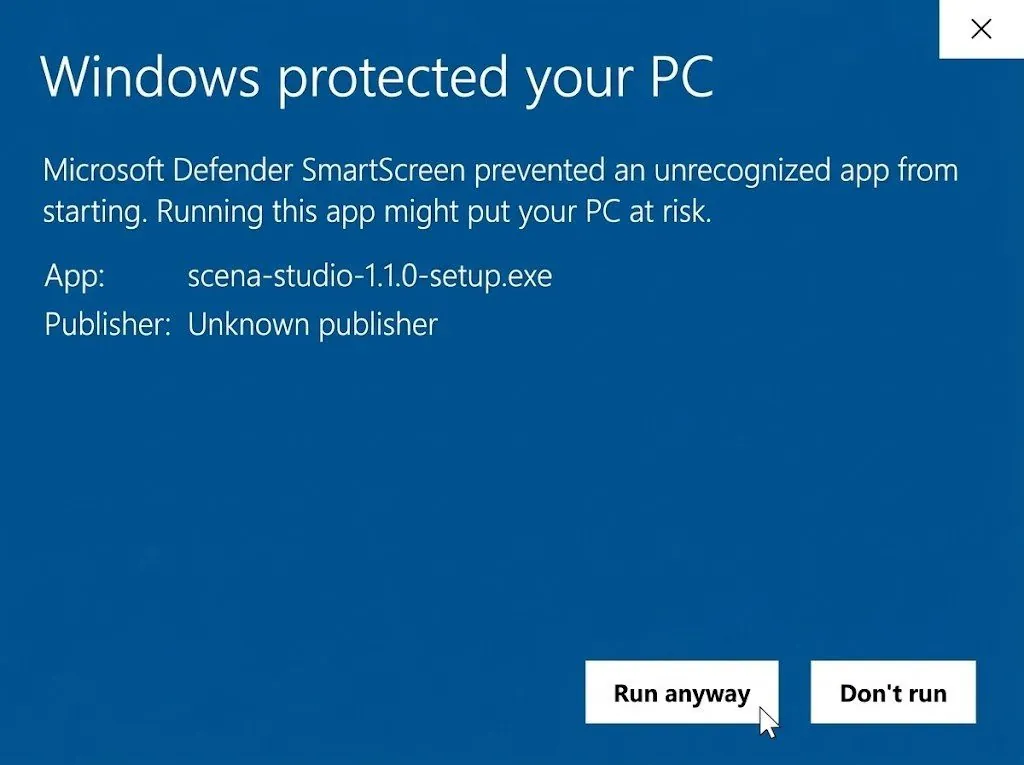
If not: Never switch SmartScreen off to get past this. Step 02 is the check that actually means something; SmartScreen only knows it has not seen enough installs yet.
Allow the installer to make changes
Pick where it installs
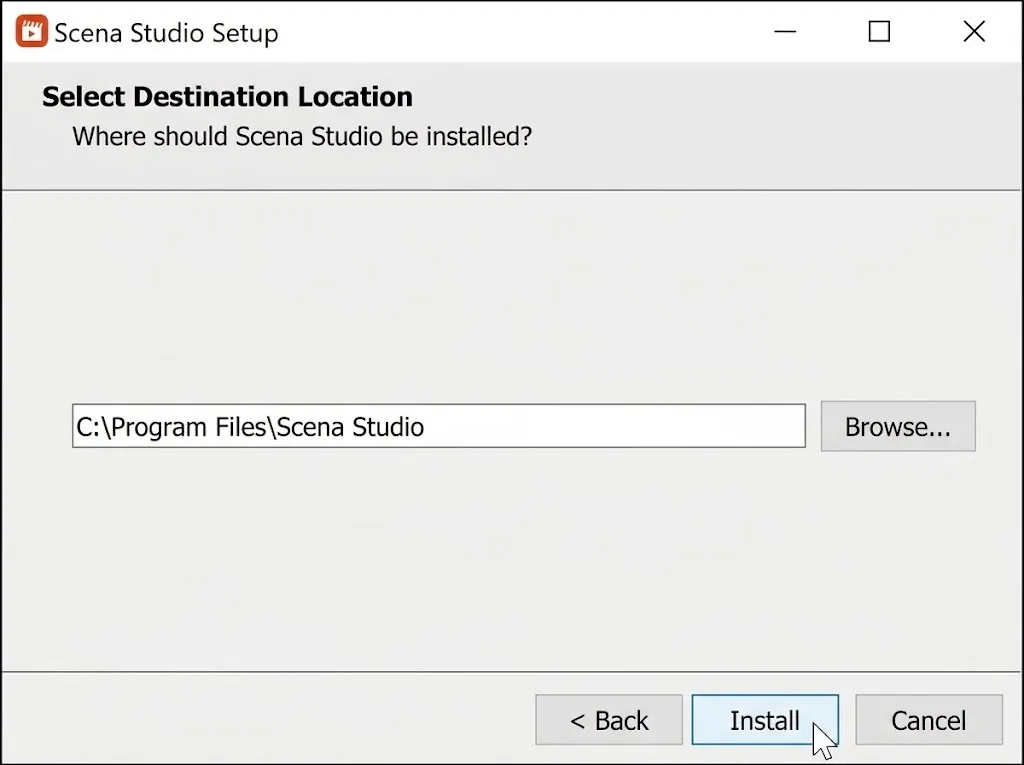
If not: Low on C:? You can point it at another drive here, but episodes do not live in this folder anyway — that is chosen at step 11, and that is the folder that grows.
Finish, and launch
If not: If the app does not open automatically, launch Scena Studio from the Windows Start menu or desktop shortcut. You can always verify the installer’s SHA-256 checksum and 0/72 VirusTotal report on the download page.