How to batch generate AI video clips and retry only failed shots
Plan an AI video batch, approve starting frames, separate dependent shots and recover failed renders without resubmitting successful jobs.
Start with a four-shot pilot
Batch video generation puts several clip jobs into one queue. Each job needs a stable shot ID and a clear condition for approval. Set up four rows from the same scene before queuing an episode. Give each row a prompt, duration, output ratio, model and any required references. Use the same shot ID in the output filename so the editor can find a replacement without reviewing the whole batch.
- S01. Render a wide shot of a person at a kitchen counter from an approved still.
- S02. Render a separate close-up of the cup from its own still. It can run alongside S01.
- S03. Continue the reach from S01. Wait for its approved result before extracting the last frame for the next clip, when the model supports a starting frame.
- S04. Render an insert of the steam and cup handle. Review it against the approved cup reference.
Approve stills and separate dependencies
Check framing, face, wardrobe and props at the still stage. A prompt edit can fix the movement, while an incorrect first image may carry the same visual error through every second of the clip. Release the independent rows first. Hold any continuation until its source clip passes review. Choose the saved, approved frame rather than the frame from a newer draft.
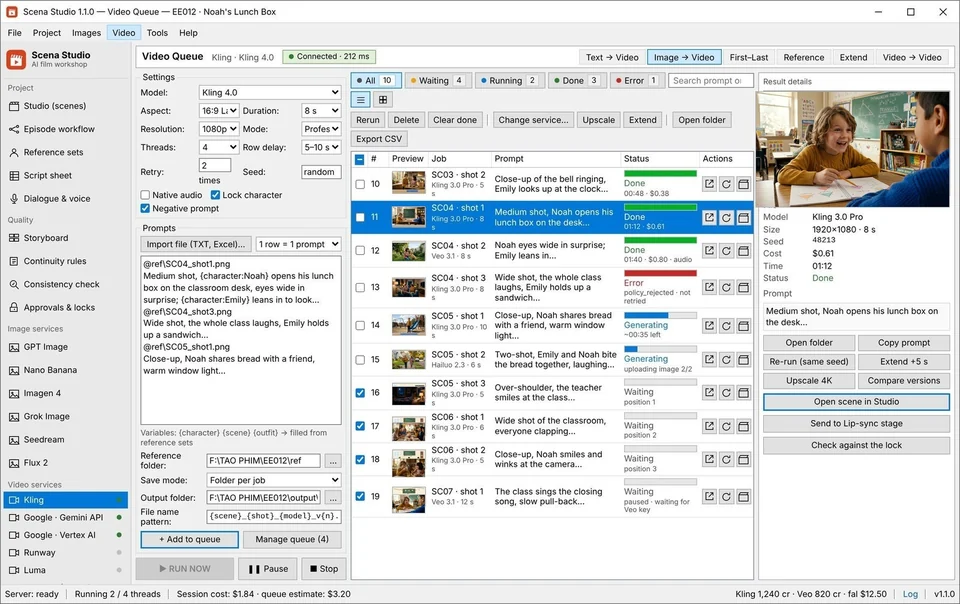
Keep the queue running within the provider’s limits and keep the app open while it works. Scena Studio stores its queue on disk and can resume after an interruption. The queue keeps successful jobs out of retries. Scena Studio batch queue and recovery.
Use the failure reason to choose the next action
- Timeout or rate limit. Check the job status and provider limits before retrying the failed row. Give an active remote job time to return before submitting a replacement.
- Missing reference or rejected input. Repair the asset link or request settings before spending another render on it.
- Completed clip with visual drift. Mark that take as rejected, revise the still or prompt and create a replacement for the same shot ID. Keep the approved takes.
Before expanding to the full episode, compare each pilot output against the shot list and record which takes the edit will use. Note any paid attempts by shot so that the next batch estimate includes the kinds of corrections you actually needed. Full script-to-video workflow.